Proxmox home cluster (II)
This is the second part of my previous post about Proxmox basic installation.
Now we have a working cluster, where we can start virtual hosts and LXC containers. However, the storage is local to each node.
What we’ll achieve next is to incorporate shared storage to this cluster.
As a starting point, I used this blog post from Lobobrothers (it’s in Spanish).
The steps I followed:
-
If you installed Proxmox with a single disk, and left enough disk space in the installation process (see previous post), here is the time to partition that space to make it available for Ceph:
See the current configuration:
 root@pve01:~# fdisk /dev/nvme0n1

 Welcome to fdisk (util-linux 2.38.1).
 Changes will remain in memory only, until you decide to write them.
 Be careful before using the write command.

 This disk is currently in use - repartitioning is probably a bad idea.
 It's recommended to umount all file systems, and swapoff all swap
 partitions on this disk.


 Command (m for help): p

 Disk /dev/nvme0n1: 931.51 GiB, 1000204886016 bytes, 1953525168 sectors
 Disk model: KINGSTON SNV3S1000G
 Units: sectors of 1 * 512 = 512 bytes
 Sector size (logical/physical): 512 bytes / 512 bytes
 I/O size (minimum/optimal): 512 bytes / 512 bytes
 Disklabel type: gpt
 Disk identifier: 712DDA48-E2CF-4783-AEAD-5103BB5DAD17

 Device             Start        End    Sectors   Size Type
 /dev/nvme0n1p1        34       2047       2014  1007K BIOS boot
 /dev/nvme0n1p2      2048    2099199    2097152     1G EFI System
 /dev/nvme0n1p3   2099200  421529599  419430400   200G Linux LVM

 Command (m for help):
Create a new partition:
Command (m for help): n Partition number (4-128, default 4): First sector (2099200-421529599, default 2099200): Last sector, +/-sectors or +/-size{K,M,G,T,P} (2099200-421529599, default 421529599): Created a new partition 4 of type 'Linux filesystem' and of size 730.5 GiB. Command (m for help): w The partition table has been altered. Syncing disks. -
After loggin in to the admin console, I click on Datacenter -> Ceph. And we receive this message:
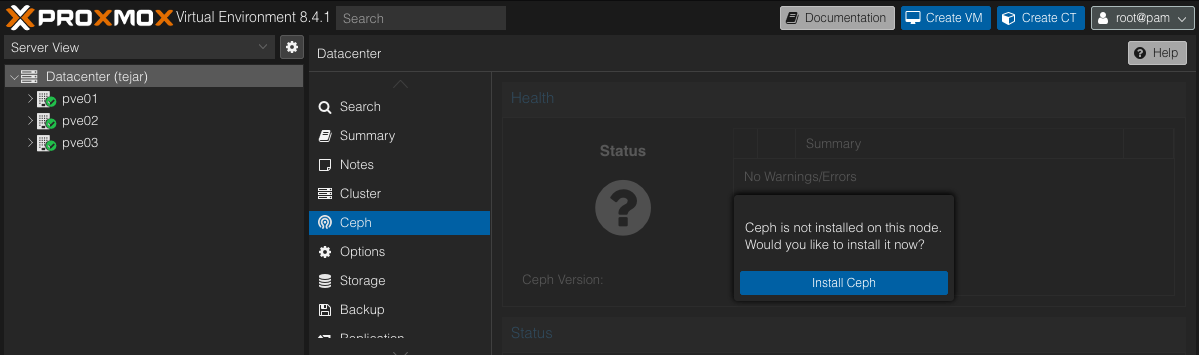 So we accept.
 -
We’re offered a screen to select which version to install:
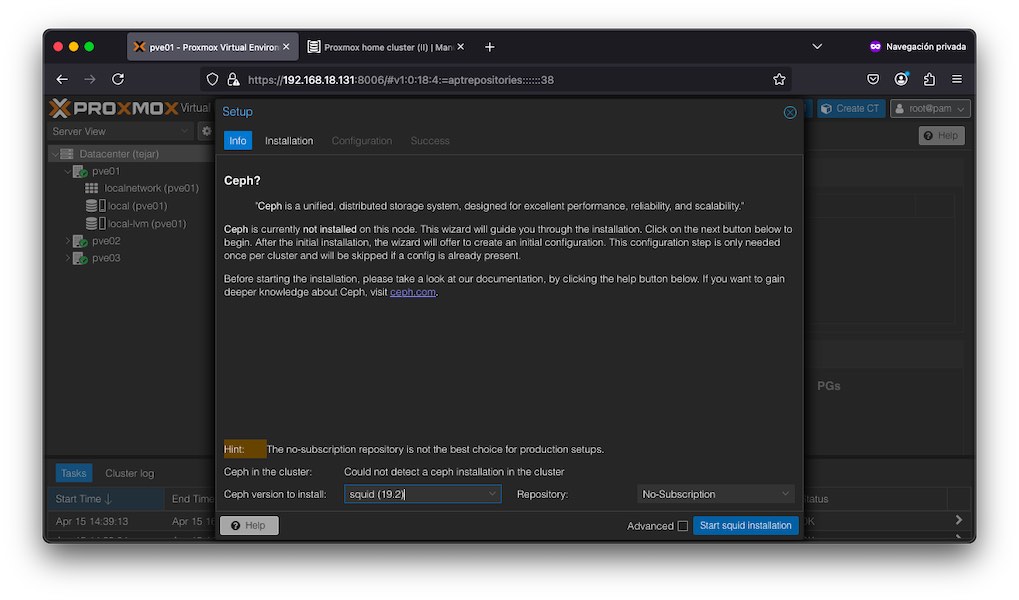 After selecting the latest non-subscription version, we click on Start squid installation.
 -
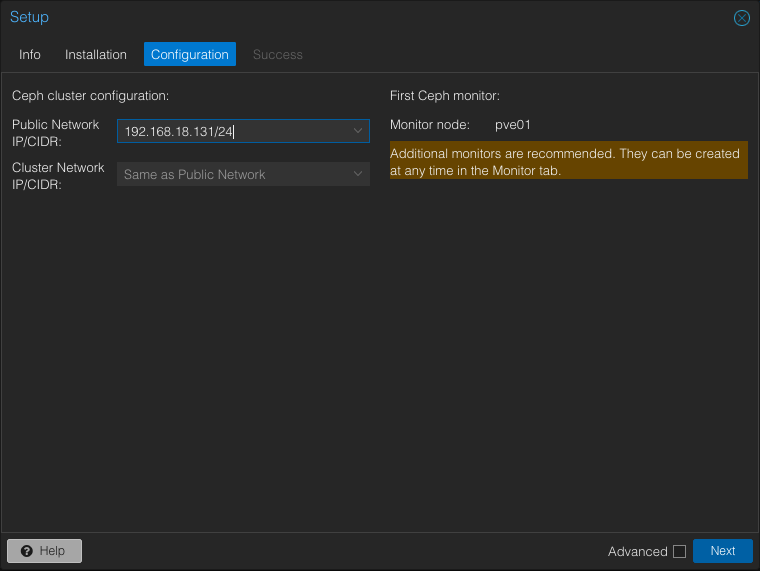
Once we finish the installation, click on Next. Select the network for Ceph to use:
-
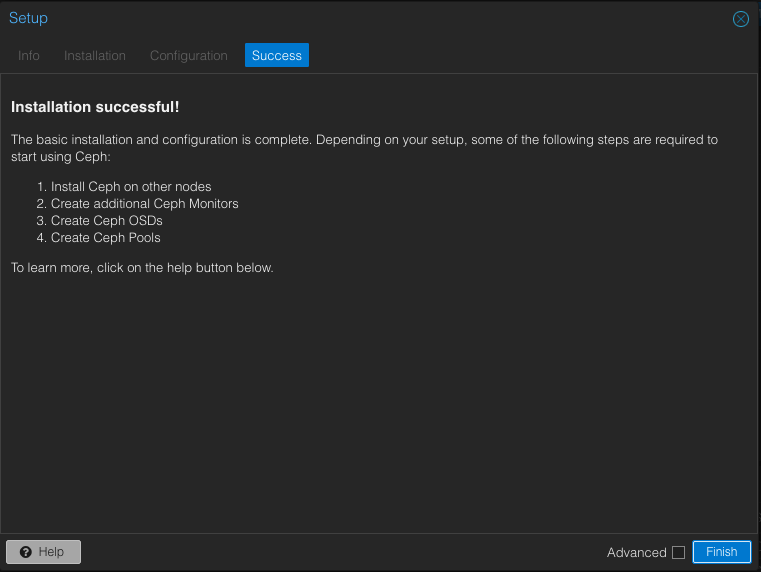
Installation of Ceph in the first node is done.
-
As we’ve been told, we’ll repeat the steps in the nodes
pve02andpve03. -
Now, for each of the nodes, we click on
Ceph->OSD->Create: OSD: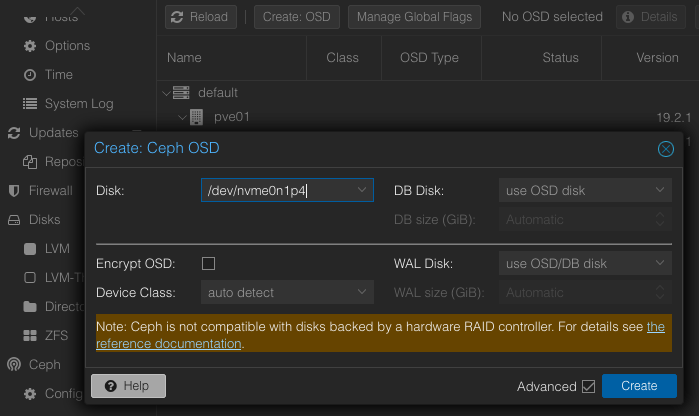
-
Again, for each of the nodes, we click on
Ceph->Monitor->Create: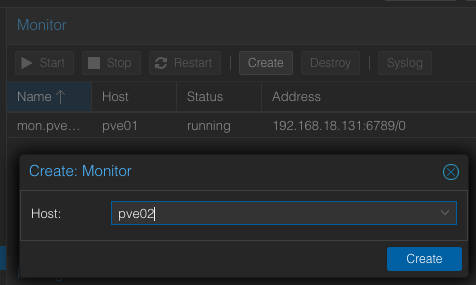
-
For nodes
pve02andpve03we’ll create additional manager processes, by clicking onCeph->Monitor->Manager->Create: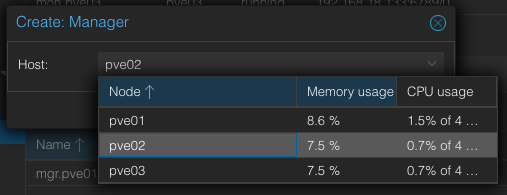
-
Now, if you were hosting different storage types, you would want to establish a new set of CRUSH rules for the OSDs. If you have a single storage space per node and OSD, you can safely skip this step.
In a case you wanted to have Ceph with different set of disks per node, like spinning, SSD, or a bunch of disks to be split in different groups, please go ahead and check Ceph CRUSH & Device Classes section of the documentation.
-
If we now click on
Ceph->OSDwe can see something like this:
-
Now it’s time for create a Ceph pool, where virtual machines will be stored. Go ahead and click on
Ceph->Pools->Create:
-
We can check under
Datacenter->Storagethat we do havepool1available for shared storage:
Now we’re ready to create a new virtual machine in the Ceph shared storage.
From here on, these are optional steps.
If you plan to use Ceph CSI in your Kubernetes cluster, with CephFS, you must add now at least one Ceph Metadata Server.
-
You can create an MDS through the Proxmox VE web GUI’s
Node->CephFSpanel ->Create: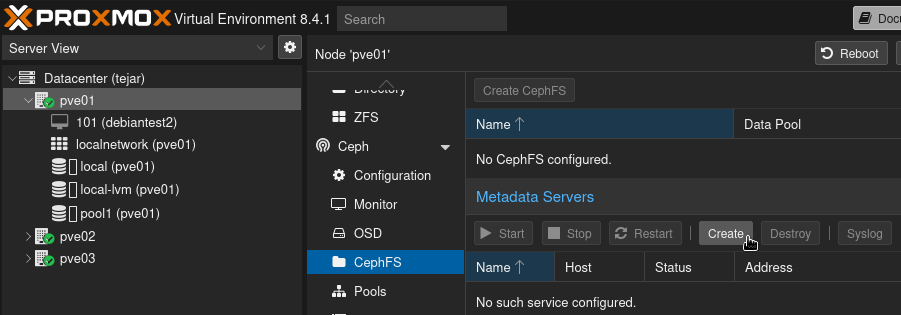
-
In the dialog box, confirm the creation of the first metadata server:
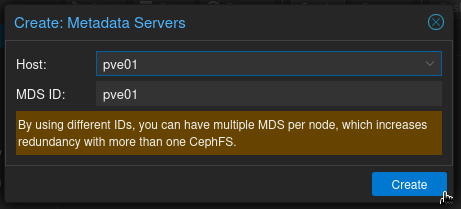
You can create more servers, and it is a good thing to do, but be aware that only one will be active and the rest of them will be standby servers.
-
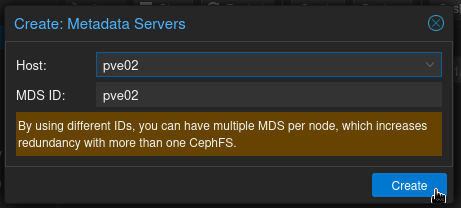
Let’s do the same with the second and third node, selecting each node and naming the new metadata servers accordingly:
-
Now, and before you create any Ceph FS, the status of all MDS is
standby: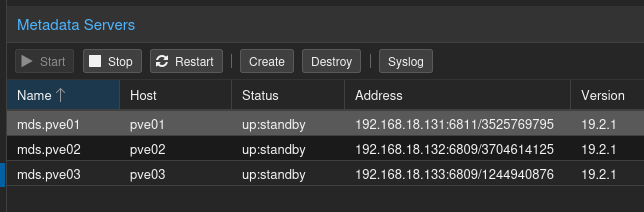
We’ll take care of creating a Ceph FS in a separate post, together with its use case.